Whether you're growing your very own herbs (garden bed, planter box, window sill, we celebrate it all!) or wildcrafting with intention, the way you harvest and dry your herbs plays a major role in their shelf life, potency, and therapeutic ability. This process isn’t just about preserving a plant’s medicine, it’s also about honoring its life and ensuring that what ends up in your jar reflects the vitality of what once grew in the ground. So here's a simple guide to help you harvest and dry your herbs with reverence and precision.
How to Harvest
The hard work is behind you, and now it’s the fun part! Harvesting herbs is all about timing. The moment you cut into a plant, its chemical profile starts to shift. In order to preserve the active constituents, try to harvest the different plant parts as follows:
-
Aerial parts (leaves, flowers): In the morning, after dew has dried yet before the warmth of the sun gets too hot. This helps prevent wilting and loss of volatile oils.
-
Roots: In early spring or late fall, when the plant’s energy is concentrated underground and it has not yet bloomed.
-
Seeds and fruits: When they’re fully ripe but not overly dry or shattering.
-
Bark: In early spring, when sap is rising and the bark slips away easily.
In general, you always want to harvest your herbs in dry weather, as any moisture (rain, snow, mist, etc) can cause mold to grow during the drying process and ruin the whole batch!
Pro tips:
-
Use clean, sharp tools to avoid bruising or damaging the plant you’re harvesting from.
-
Avoid over-harvesting. Never take more than 1/3 of a wild plant stand, and make sure that you’ve seen the plant at least a couple times before harvesting it. This ensures that you’re only taking from abundant sources that can withstand the loss.
-
For health reasons, harvest only from clean, uncontaminated areas, ideally avoiding roadsides, sprayed lawns, and industrial zones.
-
Handle plants gently to preserve their volatile compounds and prevent any oxidation from occuring.
The Best Drying Methods
The goal here is to dry your herbs fast enough to prevent mold, but slow enough to retain their medicinal qualities, especially for delicate aromatics (like flowers!).

-
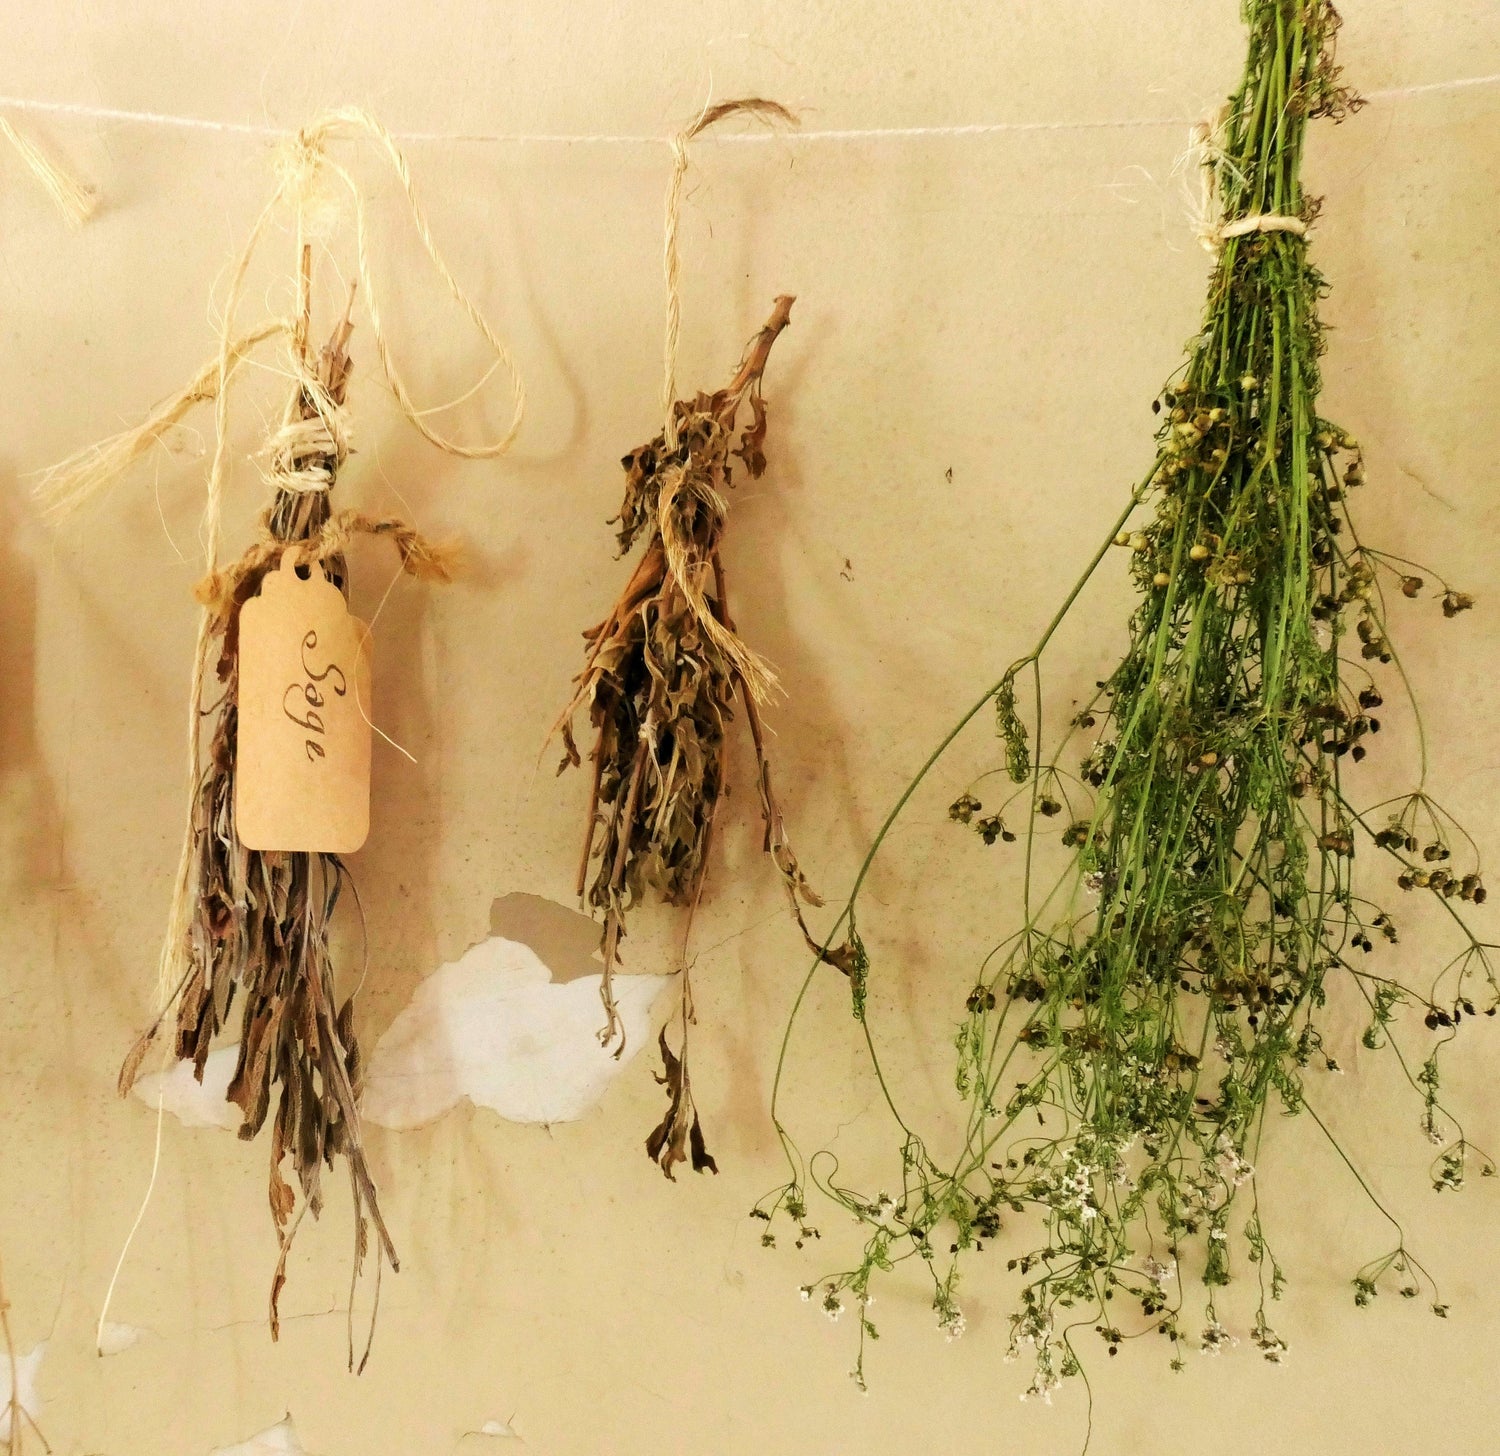
Hang drying (best for leaves, flowers, and some roots): Bundle your herbs in small bunches (but don’t pack them too dense), tie the stems with a rubber band or twine, and hang then upside down in a warm, dry, dark, and well-ventilated space. We like to make closelines with twine and hang them from there! Hanging herbs look really beautiful in your kitchen or dining room, too.
-
Flat drying (for individual leaves or small flowers): Using baskets, vented trays or hanging herb dryers, spread your herbs out in an even layer and let them dry in a warm, dry, dark space with steady airflow. Darkness is key because the sunlight will bleach out that beautiful green chlorophyll and can degrade the volatile oils.
-
Dehydrator drying (for roots or herbs that are on the wetter side): Use a dehydrator with a temperature setting of 95–115°F for leaves/flowers and up to 125°F for tougher roots or barks. Again, spread your herbs out in a single layer on your trays, avoiding any overlapping. It can be easy to over dry your herbs with a dehydrator, so check in periodically to ensure that they’re not getting too crispy or crumbly.
-
Oven drying (only in a pinch!): Similar to the dehydrator, you’ll want to use a very low temperature here – somewhere around ~100 degrees with the door cracked for airflow. Because this is the least controllable option, it’s not recommended for delicate medicinal herbs.
You can tell your herbs are fully dry when the material is snappy or crispy, without any bendyness or softness. You also want them to retain their original color and aroma, so if either of these disappear, you’ve gone too far.
Storage Tips

-
Store your herbs in airtight, labeled containers (glass jars with tight-fitting lids are our favorite option!).
-
Keep them in a cool, dark, dry place like a pantry, drawer or home apothecary.
-
Avoid using plastic bags as they can leach or trap moisture and cause mold to grow.
-
Label each jar with the individual plant name, part use, and date harvested. This step might feel unnecessary, but once you have a bunch of stored herbs you’ll be amazed at how quickly they all begin to look like eachother!
-
Most herbs remain potent for around 1–2 years, though roots and seeds often last longer.
Harvesting and drying herbs is equal parts science and ritual. During the process, take time to connect with the plants, offer them gratitude, and consider how this medicine will one day support you and your community’s well being and healing. It’s important to remember that when we handle herbs with care and intention, that energy gets transferred through the plants and into our mugs, meals, and medicine cabinets.


